Friday, 15 August 2014

Putting the new front end on

I decided that it was time to spruce up the annex pole holder. As I was running low on paint, I decided to cheat a bit. Didn't do too well throughout the exercise with paint. Spilt about 200ml of undercoat on the grass. Lost about the same with the first coat in the same manner in almost the same spot. The can fell from the bench onto my drill box, and as the lid was only pushed back on, it dribbled down the sides.Then painting the chain with a spray can that i thought had run out of air, I punctured it to get to the rest of the paint - and it hadn't run out of air! dots all over the drive way - SWMBO was not impressed, and to her credit said that the drive is covered in other marks (owned a falcon) so it probably doesn't matter. No wonder I love her. Some how, there is about 50ml left for touch up.


Had to re bend the gas pipe and add a fitting cos the bottle is now 1m further forward. The pipe used to only be held up by the regulator being attached to the van. I've now attached it with brackets to hold it up properly. 
The bike rack i did my measurement, and as can be seen aint straight at all. So attached the rack to the mount and bent some more brackets


Having the rack made all the difference. Fits perfectly, a couple of tek screws top and bottom and tis done.
The bracket is part of a scaffold thing I picked up years ago, that has finally come in handy.
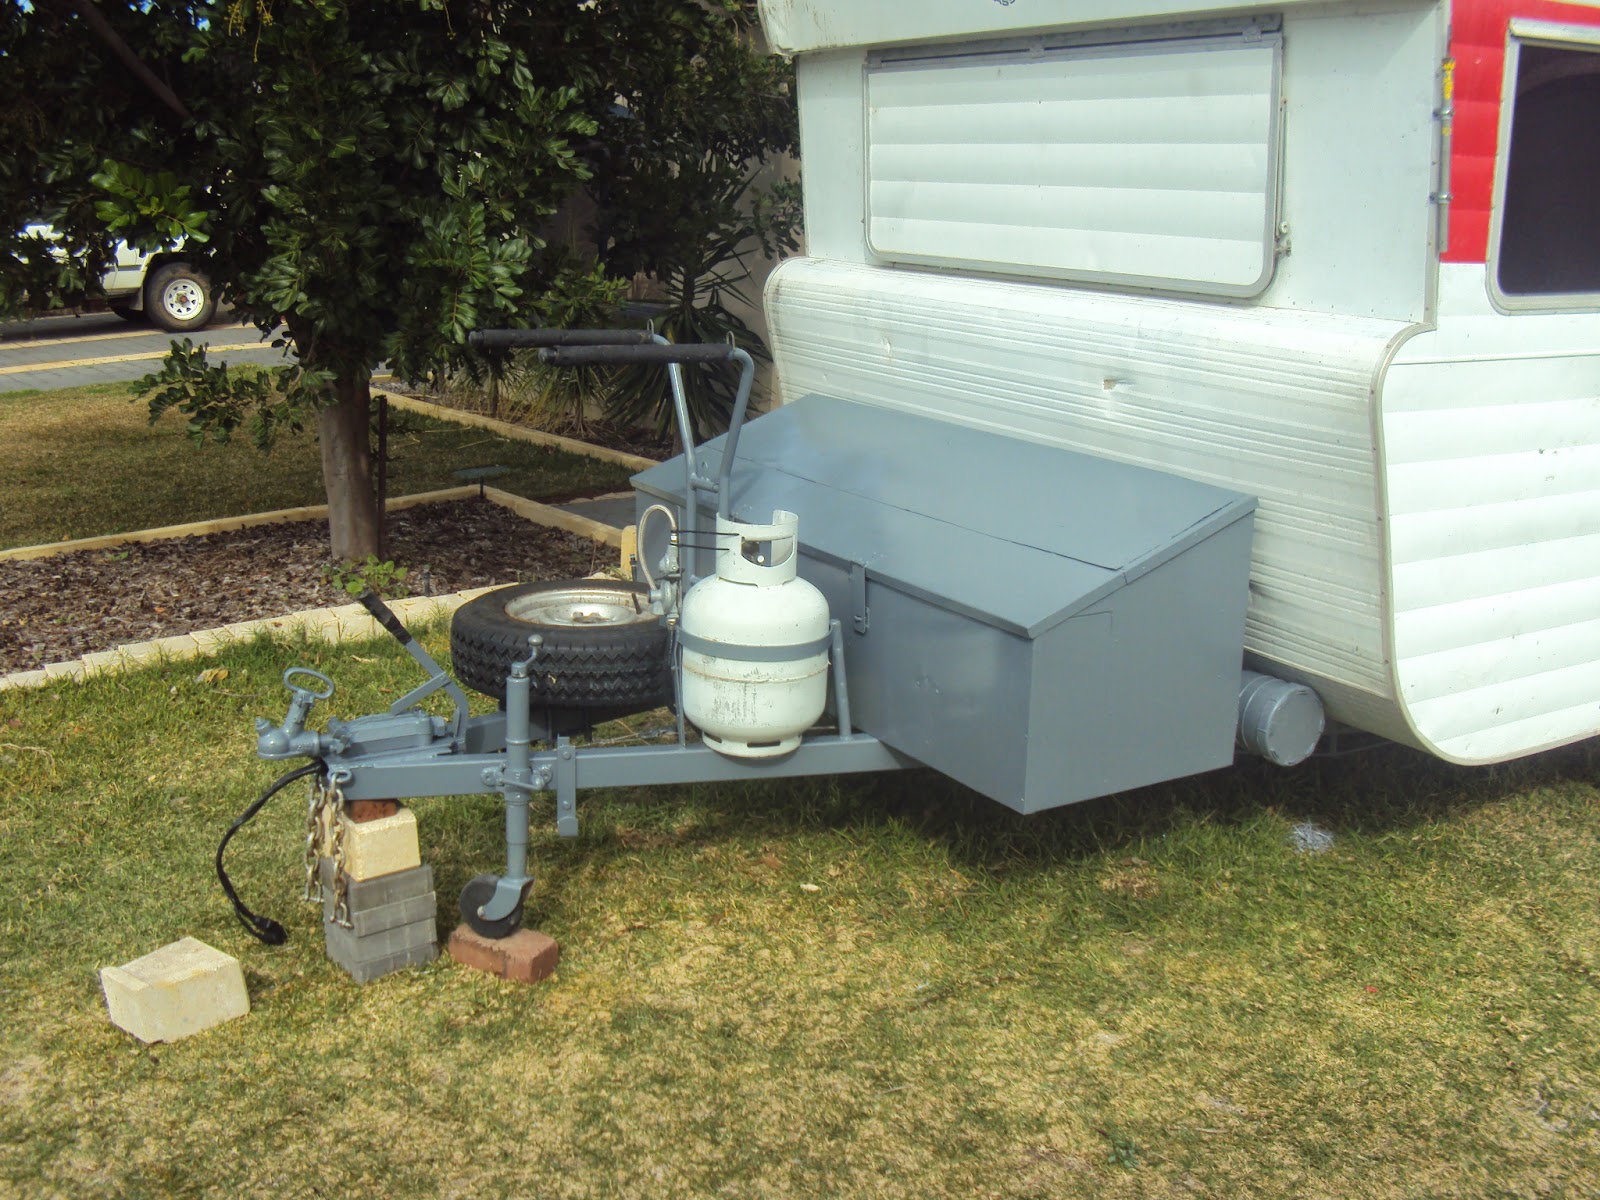


The spare took a bit of shuffling to get it into the correct spot and the regulator is mounted to a metal strip that is attached to the cylinder holder. This keeps it above the height of the LPG. Re adjusted the brakes. So the van is now all ready to go. There are a few bits and pieces that need doing and of course the ongoing maintenance. But as with any refit, the van is a blank canvas and we are only restricted by our imagination and what we can find in the council pick ups!

Thursday, 14 August 2014

tool box for new draw bar


 Now that we have a bigger draw bar, a tool box would be handy to put the boat in. Cheapest box $97, small and flimsy. Box that would suit, $400 and weighs far too much.
The ingenious plan...make my own out of a galvanized shelving unit.
Start with a cardboard model and see where to fold for the best results:- this should be a piece of cake!

1. Empty shelves and kick the wife's car out of the garage to give me somewhere to work.

2. Remove shelves - save for later.

3. Cut top and bottom shelf across the center and stand upright.

4. Using a rope 1/3 and 2/3 of the way down, pull together to make 1/2 the width - sorry no photo of that, dunno how I missed taking one!

5. Lay the whole lot down again and rivet the ends to the desired angle

6. Cut off the side, that is now the top as this will form part of the lid.


7. Using the rubber persuader get the fold to a 90 degree angle.

8. Cut off the top bits to make a slope from front to back. By adding the cut off bits to the front makes the slope. 

9. Add some support to the back for the lid to hinge from


10. Trim off two of the shelves to make a lid long enough to fit.
11. Add hinges and clasps.


12. Add a lick of paint and she's ready to fit. And you can stick your $400, mine cost $80


Monday, 11 August 2014

Rust, the silent plague

 Whilst inflating the spare, I noticed the rust spots looked a bit worse. A couple of taps from a hammer and most of the bottom of the draw bar fell off!!!
Although better, the other side was also becoming a bit dodgy. This job was gonna be HUGE. I cant imagine how many cutting wheels I would have to use to take the old bar off and my Arc welding is nowhere near good enough to attach the new bar. And how the hell am I gonna get under it?  I put the water proof coating on the bottom without too many problems but using a brush is 100 times easier than weilding an angle grinder in a confined space! Acomec machinery to the rescue.


 The  van was too wide to fit on the vehicle hoist, it was occupied with  another project anyway. So blocks of wood went under the back frame and she was hoisted up and sat on a couple of 44 gallon drums. I had already taken off the gas tank, spare tyre and pole holding tube.

 This shot gives an idea about the angle we put the van on. I just hope there is nothing inside that will let gravity take over.
The old draw bar came off, with a little help from the oxy acet.  We decided to reuse the jockey wheel clamp and other fittings needed. It took me an hour to cut it off with the grinder.  It was at that point that I was glad I wasn't trying to do the job at home with the angle grinder!


Draw bar is in position ready for welding. This is a two man job, as the measurements from the front of the draw bar to the van have to be constantly checked to make sure it's in the middle.
As it was beer o clock and the Mig had run out of Argon, we decided to give it away for day one.


 Day 2 saw the bits come off the old draw bar cleaned up and ready for re use .
I had cleaned up all the bits of metal left from the removal and removed any rust, paint or galvanisation for any part that was to be welded. As this was underneath the van I had to sit on the floor and reach up. I got covered in filings and dirt...now I know why I got the job!


  I enjoy doing work on anything myself. Most of the time, if I need any special tool, I will make do or adapt what I already have. This is a piece of 16mm mild steel that the hitch will sit on. Once again I was glad I wasn't at home because it would have taken me forever and an unknown number of hack saw blades. This machine - You turn it on an it lowers itself at a set rate, then turns itself off when it's finished

 Here is the engineer at work.  After I'd drilled holes in the plate, once again using the right tool, a drill press, the holes went in easily. If I'd've done it at home probably would have taken me all day to drill the holes and wrecked my drill bits
Draw bar all done, I'll take the van home to re do gas lines, wiring and repaint. I have an idea to put a tool box on the bar. I've looked around and the one we need is too heavy and nearly $400. So I have an ingenious plan...

Tuesday, 29 July 2014

A Dunny


We had stored the empty water containers under the bed at the back of the van. But figured, when full, nearly 100kg at the back of the van may not be the best idea. So off came the bottom two shelves of the bookcase (couldn't really use them anyway). Now the weight is up the front and access is much easier.
We were given an unused porta potty and a pot up en suite tent by a wonderful family friend (must get him something special for that). Wanted to make it easy to get to, so off came the bottom shelf of the little book case. Had to raise the unit about 150mm but all fitted perfectly.
The pop up en suite is a good size and can be erected in 2 seconds. But we will only use the en suite if necessary as it takes about 20 minutes to put away!! You are required to wrestle the top to the bottom, twist one half clockwise, the other half anti clockwise, what a pain. Though I must admit more use will hopefully make it easier to return to its carry bag

Solar lights

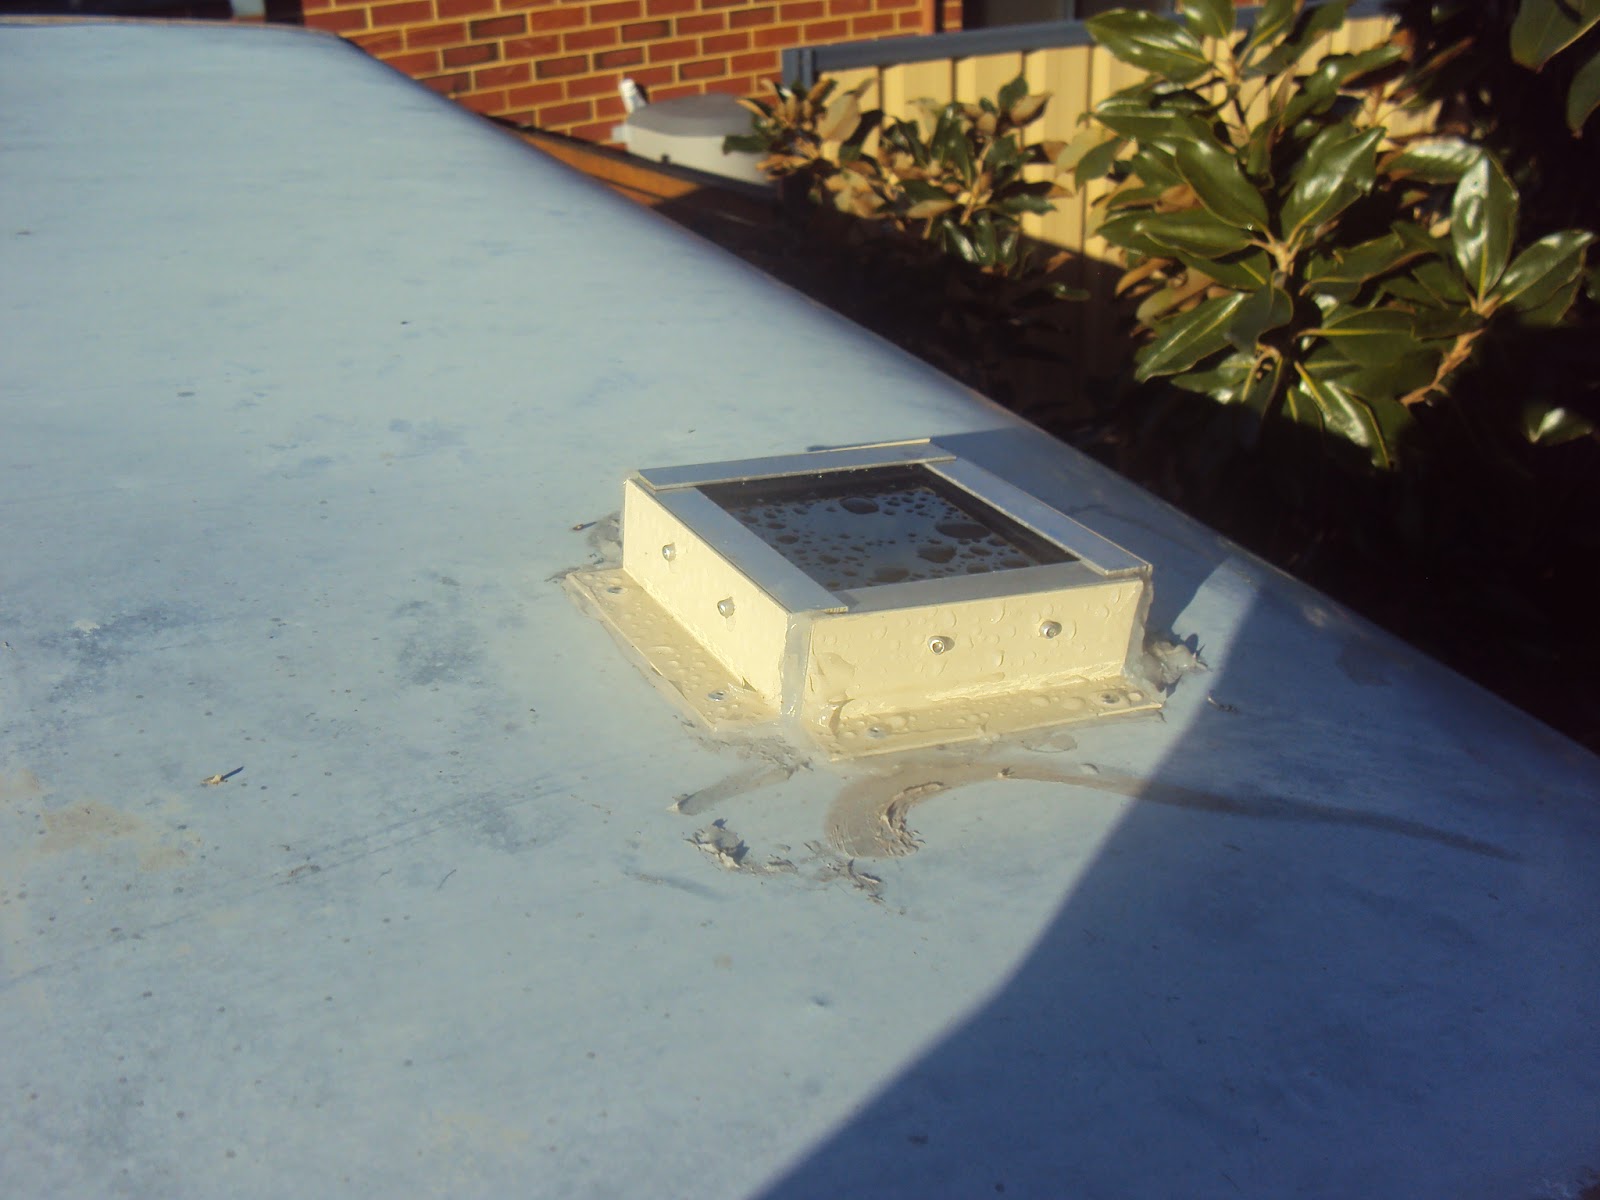
 In our quest to be self sufficient, We have added 3 solar shed lights. Available at Bunnings for $13 each. I have put them more or less where the roof lights are. They have turned out to be fantastic.
I made up some brackets with some 'U' channel, and riveted 'L' bracket to the side.
As the hole in the roof needed to be about 13mm in diameter, I sealed the wire in with silicone instead of using a grommet.
I spent quite a bit of time making sure the unit was totally sealed.
The two lights toward the front of the van, I put both solar panels in the one bracket.

Looking at the photo, top, the vent needs another paint.
Actually the van could do with a fresh coat. But I'll use automotive paint this time...Well when we can afford it. It seems to be the old Murphy's Law again. I'm out of work at the present time, so I have a heap of time to do all the things that need doing on the van, But, have no additional funds to do anything!

Monday, 3 June 2013

The Annex

The annex was given to us and is not the standard for the Viscount. Half the white section should be on the ground. But as it wasn't raining it kept most of the wind out. The last time we camped we used the tent so it had been a while since we had put the annex up. Because we leave the ropes and pegs for the tent in the van I was able to use the guy ropes and stays from tent to stabalise the annex. A major plus when you are using non standard parts is the knowledge of knots, this is where the cubs and scouts movement comes in handy. We have put a holder on the side of the van to hold the centre support bar. The holder is 30mm in diameter, whilst the support bar is 10mm in diameter, so it's not what you would call a tight fit! so when the wind started to gust and moved the annex up and down, the support started to bang against the van...unfortunately this was at 2 in the morning. A scrunched up chux super wipe solved the immediate problem. I then sat and half designed a solution for the problem...so it will be coming soon.

Saturday, 19 January 2013

do not overtake

As the Stavic alone has a turning circle that is double a standard car and that the rig is over the 7m minimum, i thought i would do the right thing and get overtaking plates. problem 1. finding where to get them. As far as i was able to tell, they are not available in WA! So had to source them from QLD. I was going to create them from contact to save a bit of money..but a once off $55 was a better option.
This is the kitchen area. The drawers have crockery, cutlery, pots and pans etc. Its at the perfect height for the chef. With hinges and cleats to keep the drawers closed during transit.
The frame in front of it is for the portable frig. suppose it would've been better to move it for a better picture. oh well

Friday, 18 January 2013

Did have a couple of drawers in here without a door on it. However, we came by a generator and there are other fuels to carry. The old frig area was perfect. The vents that are designed to take the gasses away when the frig is working on gas is perfect for venting any odours produced by the fuel containers, perfect.

With no where to put the table and a small gap at the foot of the bed, i lessened the width of the bookcase by the required amount so the table slots in. As the shelf was going to take Aiden's books, the table will keep them on the shelf when we are mobile. The table is heavy enough that it wont move with the motion of the van.

Spare tyre


We thought we had the spare all done! Forgot the stabeliser bars!! I knew the spare went on too easy. So after some swearing and recalulations it was off on yet another trip to the hardware shop for some longer bolts. To look on the positive side, i can load something onto the wheel if i need to. I could threaten Aiden that if he is a pain on the journey, that is where he will travel until he behaves...trouble is he'd bloody WANT to have his car seat attached to it.
Just having another look at the wheel, i suppose i had better paint the rim so it doesn't look crappy?

Saturday, 12 January 2013

cooking area

kitchen area was a shambles. doors had been taken off, frig was painted black - just like most of the other items
The later photo shows the cupboards, the old cupboards were the original wood grain plastic veneer. The shelves are now lined with the same vinyl as the floor. Where the frig was, i put a set of drawers. Decided we didn't really need them so put a shelf and door on, if i can work out how to load the photo's i'll put them in. One thing that we did find hard, was the size of the sink. Being used to a full size sink the van is unbelievably small. The girls didn't enjoy washing up in a bowl.

Tuesday, 4 September 2012

Aiden's bed - Lounge

Once again a lick of paint does wonders. This was originally the table and seats area, that could be lowered as a double bed. I suppose i really should have moved the lamp off the bed and moved the fan and broom, but you get the idea!! I'm not sure why the book case at the end of the bed has got that yellow on it, cos it's painted red like everything else. The windows appear black in the later photo, but that's just the way the light is catching it. The window on the right is made of the same perspex, probably direct sunlight is deflected differently, which is a good thing to keep the sun out a bit more.

Our bed

Our bed, before and after. It's amazing what a lick of paint can do. It looks as though the window is now square, but it's only that i replaced the flyscreen. The recess under the window is still there, but because it's all the same colour it looks like it's not there. Glad it is though, cos it's my side of the bed.

Thursday, 7 June 2012

The red stripe went on easily. it's amazing how easy it is when you use a decent masking tape.
Have sourced plastic windows that will be tinted and cut to size for $350 from Wangara. Not bad when you compare it to the $2500 for new windows!
We were guarenteed that the Mob in Wangara, knew some mob in Malaga that could supply the window sealing rubber. no they couldn't. Got hold of Martins Northside in Wangara. Talk about Aladdins cave, only a small place, but theres all kinds of stuff for the refitter. The windows went in fairly easily, all except 1. There is always bloody 1. The frame was slightly bigger so the plastic just popped out when i tried to put the window back on the van. luckily i had some galvanised strapping that i could rivet onto the frame to make it bigger. Starting to look pretty good

Friday, 13 April 2012

frig is a no go

frig is a no go. using deep cycle with inverter according to battery world, simply wont work. so plan 'b'. we cannot afford an engle or waco, but have discovered 'gear up'
its a 55l, 3 way cooler, that doesn't seem too bad for $500. especially for the amount of use it's gonna get, we cant justify an extra $1000. besides, i have been informed that these things work best on gas, which is how it will be powered most. apparently 9kgs of gas will last 28days. there are the usual * included, but hey, that will suit our use perfectly.

thing we really did like was the amount of insulation. so hopefully the unit will be perfect.
cos it runs on gas the misses is not too keen on running it inside the van. so have put a board on a stand so it can sit outside in the annex.


Have checked out the perspex windows, gonna be about $350 + the rubber holding thingos. however they are gonna take about 2 weeks to create. gonna try to put the red stripes on today...could be interesting

Wednesday, 7 March 2012

12 volt lights

this was gonna be where i said i had fixed the 12v system to work off the car... pigs arse.... haven't had time. this working full time has got knobs on it.

did get hold of a spare wheel holder. mind you i have to mount the wheel backwards so i can fit the stabliser bars. but for $40 bucks its gonna be fine.
just have to organise the deep cell batery and the inverter and the windows and the.......
but watch this space.....

Friday, 2 December 2011

front of the van


the front of the van has slotted in nicely. the girls are sitting on an ikea bed that doubles as a sofa. the draws under the sink was got street shopping across the road. the shelves at the foot of the bed was an old bookcase that i cut in half. mind you attaching it to the van was a pain in the arse cos there's no room to get any tools into the gap. dont know what to do about the gap above the drawers under the sink!
maybe i could make some kind of storage box. cut down a drawer. but we'll see, i suppose i should leave it until we start filling the van with gear and see what kind of extra storage we will need.
mind you there is still a lot of work that needs doing. and i have just been informed that 'we' will be needing fly screens on the windows...only slight problem, there are only 4 full frames for the 9 that are needed. as they are light weight frames, i dont suppose we'll be able to street shop for those...but you never know

looking pretty good

flooring is in, painting done, though i have to find the missing drawer handle. windows still have to be done. now thats it has stopped raining, i supose i now have no excuse.


frig and what will be the kitchen bench are in. they fit with room to spare - 280mm, in the area that used to be the single bunks. our bed just needs a base and matress and that is all ready to go,  gonna do some more street shopping to find a double bed base. got power from the kitchen via an extension cord, through the cupboard, under the bed and up around the back. bed size will allow a cabnet/shelf or what ever at the foot of the bed.

Thursday, 24 November 2011

flooring

Pretty crappy photo, but had to take it through the back window. putting in a 2.8 x 4 metre roll in a van is a pain in the arse. cramped, no room and buggered knees. took the misses an i an hour and a half. but the finished product looks bloody good, so it should for $350 worth of vinyl.


photo taken from the door, mind you, you cant really see the darker dots that are on the vinyl.
now that the vinyl is down, i've covered it with sheets and blankets and an old idadown that was purchased in 1962 or 3.

Monday, 7 November 2011

taking form

what a difference a lick of paint makes! the microwave is bolted in - the one the previous owner gave us wasn't and is now dead. the oven is also bolted down. just have to put some fancier's on the drawers- no idea why they were off in the first place!! and find a chest of drawers to go in the frig space. its bulk rubbish in our area so could be lucky, although it pissed down with rain last night. once the vinyl arrives it shouldn't take too long to complete the interior. the main bed should only take an hour or 2 to complete. aiden's bed is coming from ikea and only needs putting together and bolting down - with a few adjustments to allow for the curve at the end. the preparation area is from ikea, need to bolt it down and somehow bolt down the frig. haven't worried about that yet, but now its starting to come together i suppose i had better!

kitchen before refit

The doors are off, everything out, ready for the undercoat. the beige colour is the previous owners idea of sprucing the van up. did a good job.


the matress was always gonna go. as we are 6' and over tall, i was gonna get a custom mattress and enlarge the base. however apparently a normal double size is cool, so i could have left it...however the bracing used would not have allowed for certain nocturnal activities without collapsing. so hours spent cutting 5mm angle iron and putting holes in them, i dont think i will ever get rid of all the swarf, except the bits i tread on, will see the problem rectified.